Skip to content
SaaS bill too high? vibecode it, bro

VIBECODE
it, bro.

A cheap VPS + OpenCode Go = your own AI coding rig. No $200/mo bills. No lock-in. Just a terminal and vibes.

Start vibecoding →
// the stack

Two things. That's it.

01

A VPS

A $5/mo Linux box you own. Kamatera for cheap hourly, Contabo for beefy specs.

Compare →
02

OpenCode Go

$5 first month, then $10/mo flat-rate. Access to frontier open-source models like Grok 4.5, GLM-5.2, and Kimi K3. No per-token anxiety.

Get OpenCode Go →
// pick your box

A VPS that costs less than Netflix.

★ recommended
Kamatera logo

Cheap, flexible, recommended

  • Hourly billing. ~$0.005/hr. Pay for what you use.
  • 🆓 30-day free trial.
  • 📈 Scale live. Add CPU/RAM in 60s.
  • 🌍 21 data centers worldwide.
from $4/mo
Spin up Kamatera →
Contabo logo

Pricier, but beefier specs

  • 💪 4 vCPU + 8 GB RAM. Cloud VPS 4. Beefier than Kamatera.
  • 💾 100 GB NVMe. Self-host everything.
  • 📅 Monthly billing. Best for 24/7.
  • 🌐 EU, US, Asia, AU.
from $4.67/mo
Check Contabo →
🎬 Kamatera setup
🎬 Contabo setup
// the walkthrough

Fresh VPS to vibecoding in ~10 minutes.

1

Spin up a VPS

Click Kamatera or Contabo above. Launch the latest Ubuntu LTS. 2 vCPU / 2 GB RAM is plenty. Save the IP and root password.
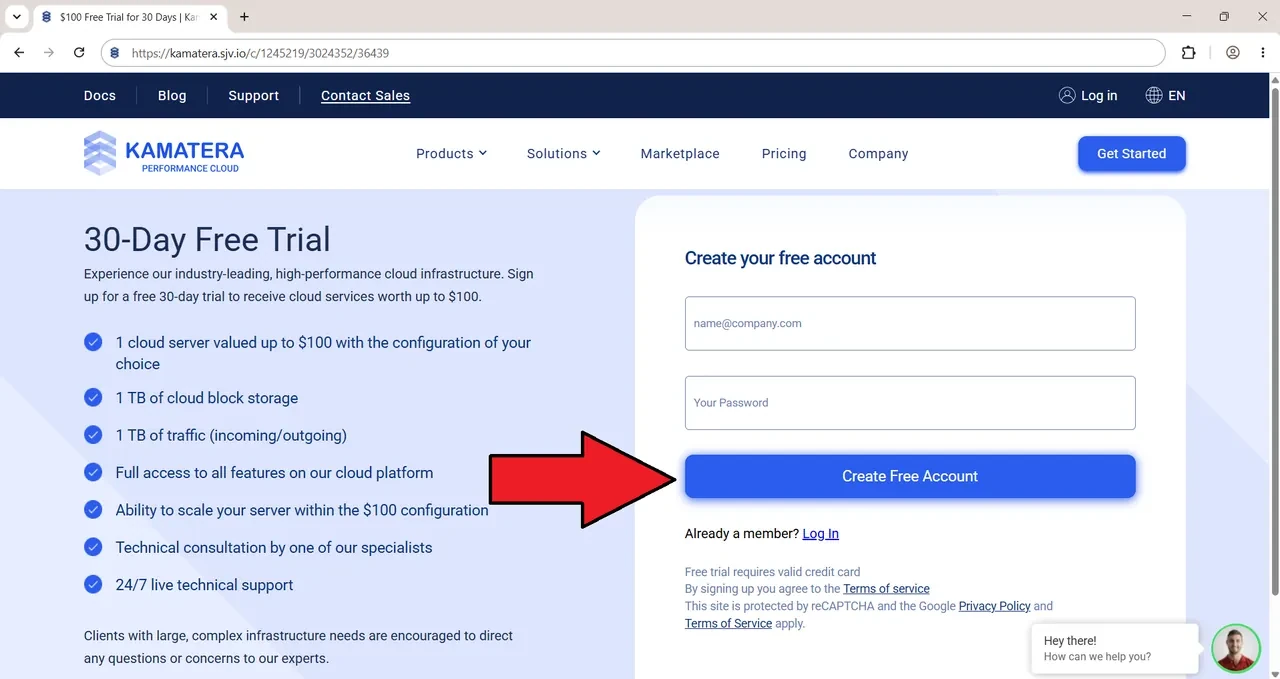
1.1Create a free Kamatera account
Create a free Kamatera account
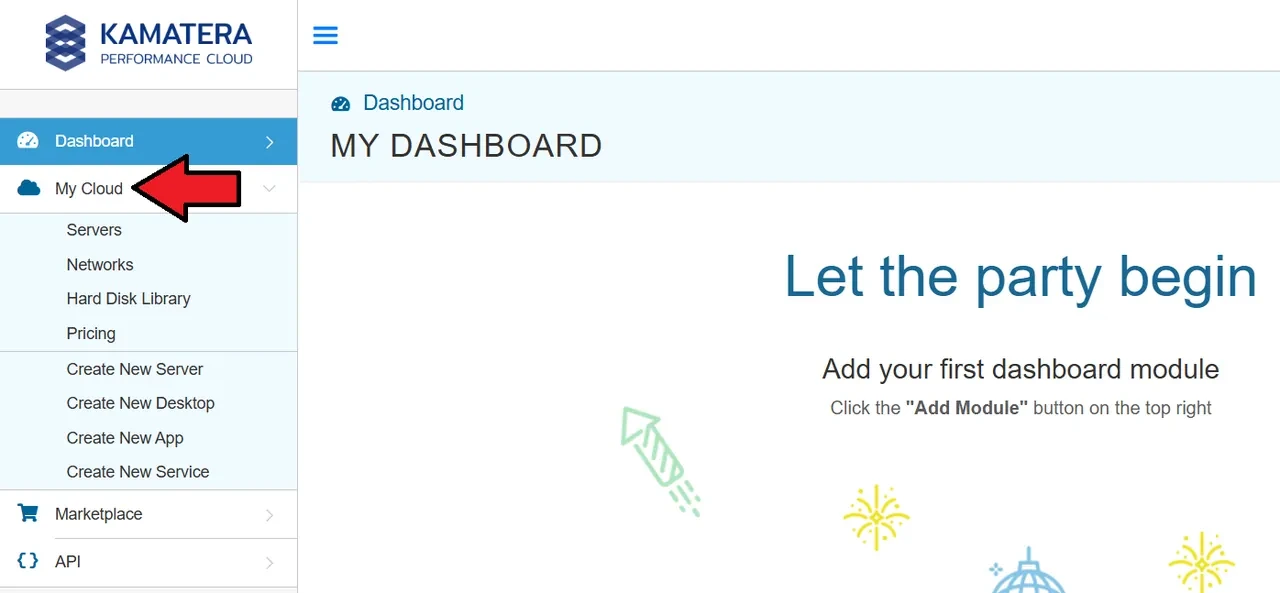
1.2Kamatera My Cloud dashboard
My Cloud dashboard
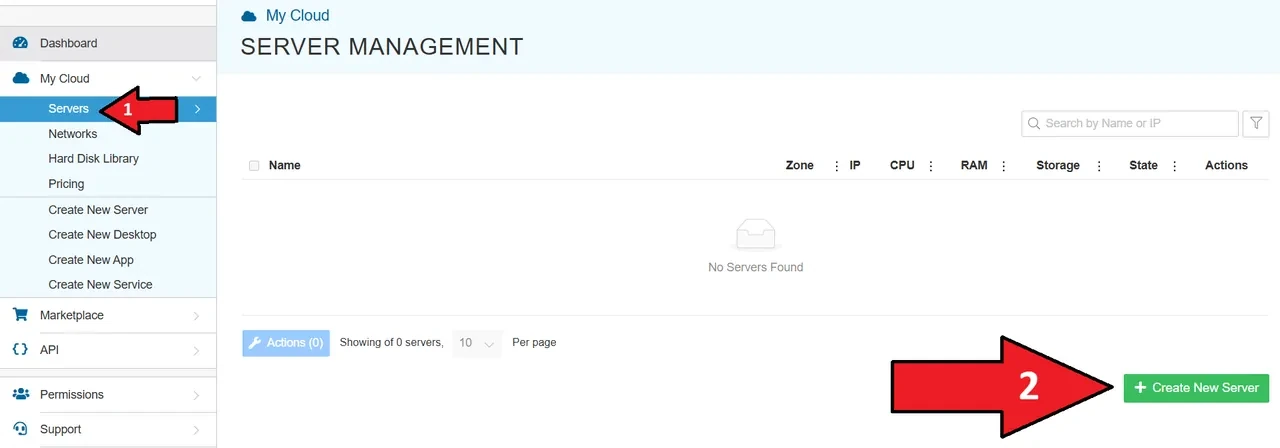
1.3Go to Servers to create a new server
Go to Servers, create new server
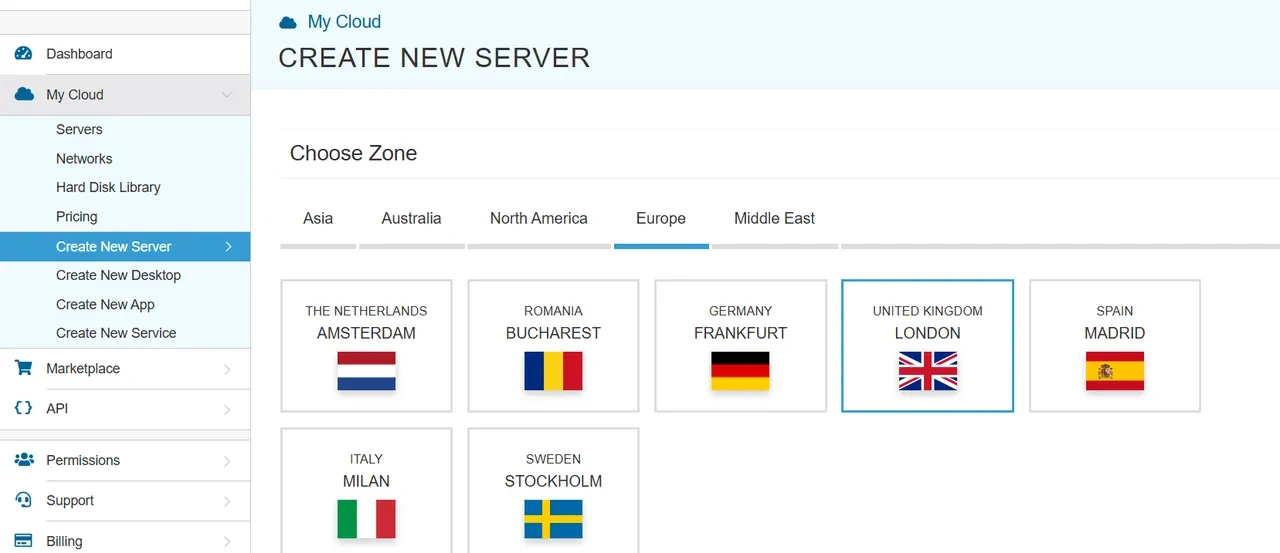
1.4Choose a continent (region), then a country
Choose a continent (region), then a country
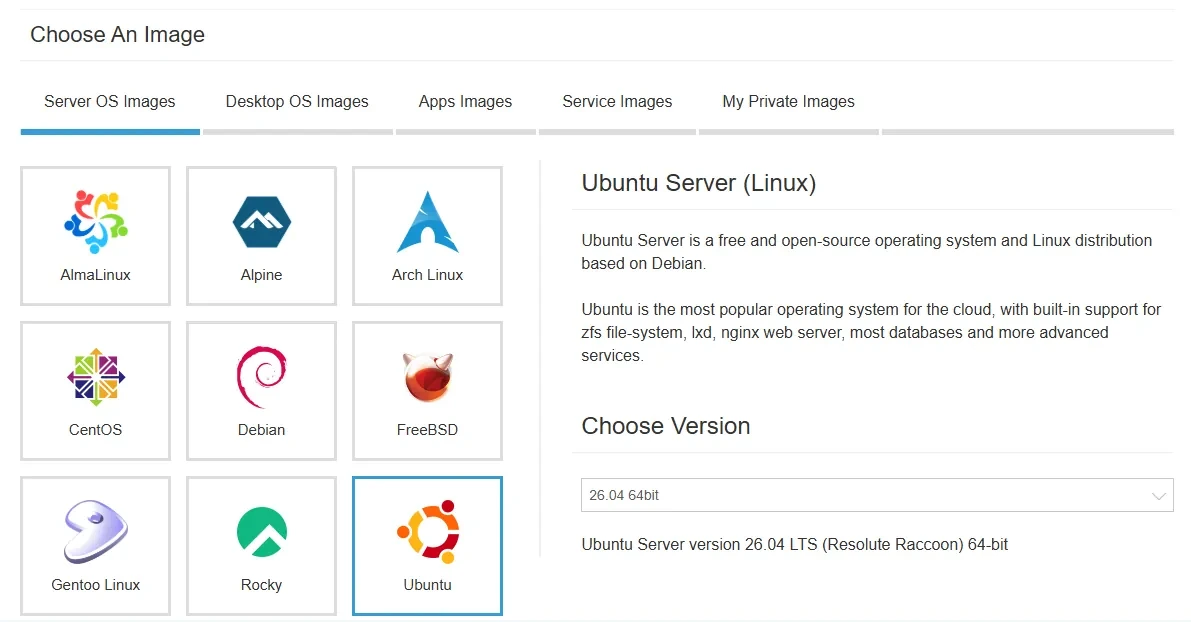
1.5Choose operating system (OS): Ubuntu, latest version
Choose operating system (OS): Ubuntu, latest version
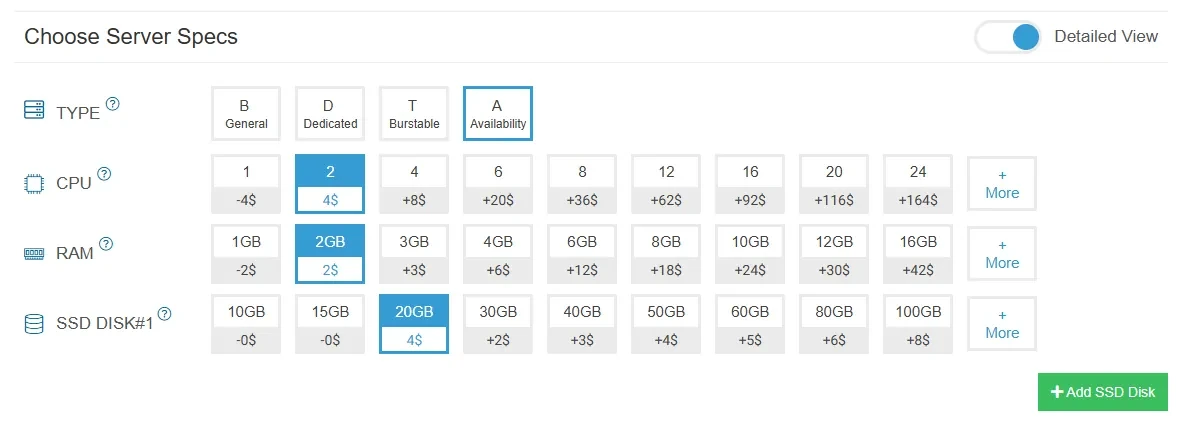
1.6Set CPU, RAM, SSD disk space, and server type (B/D/T/A)
Set CPU, RAM, SSD disk space, and server type (B/D/T/A)
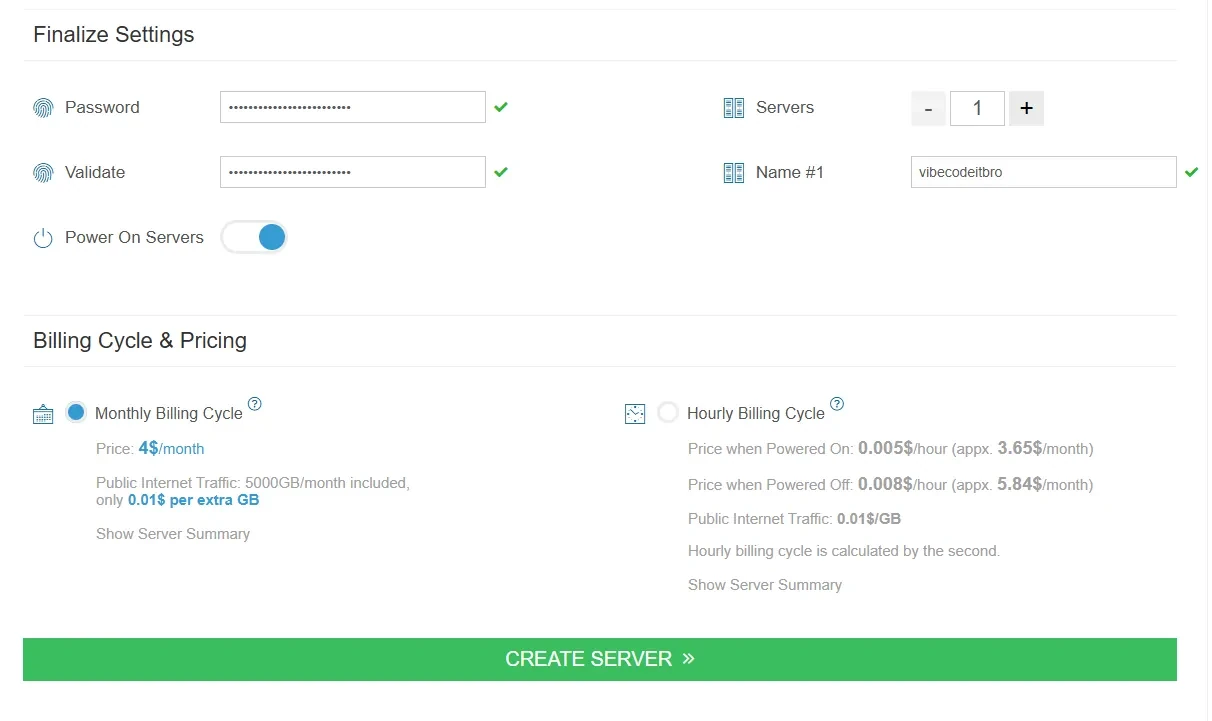
1.7Set root password, name server, and billing cycle, then create the server
Set root password, name server, and billing cycle, then create the server
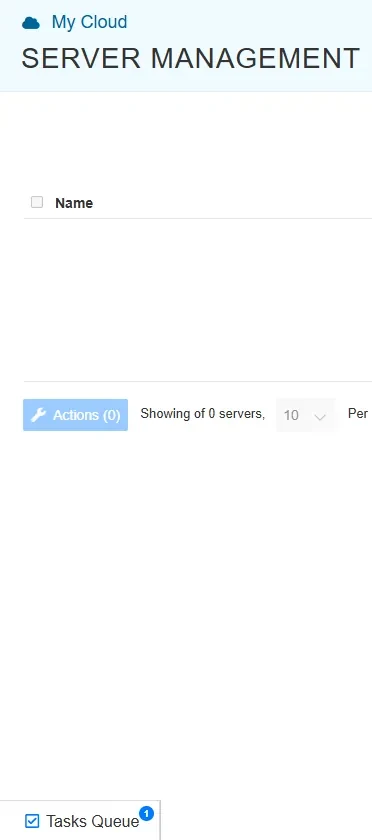
1.8Server creation added as a task in queue
Server creation added as a task in queue
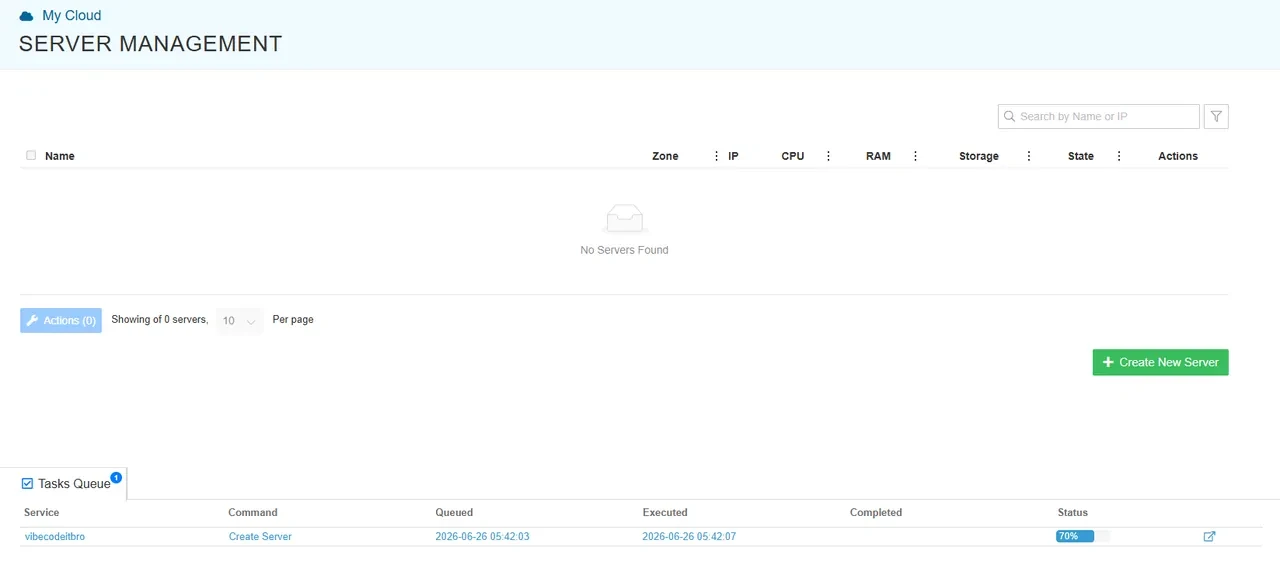
1.9Server is setting up
Server is setting up
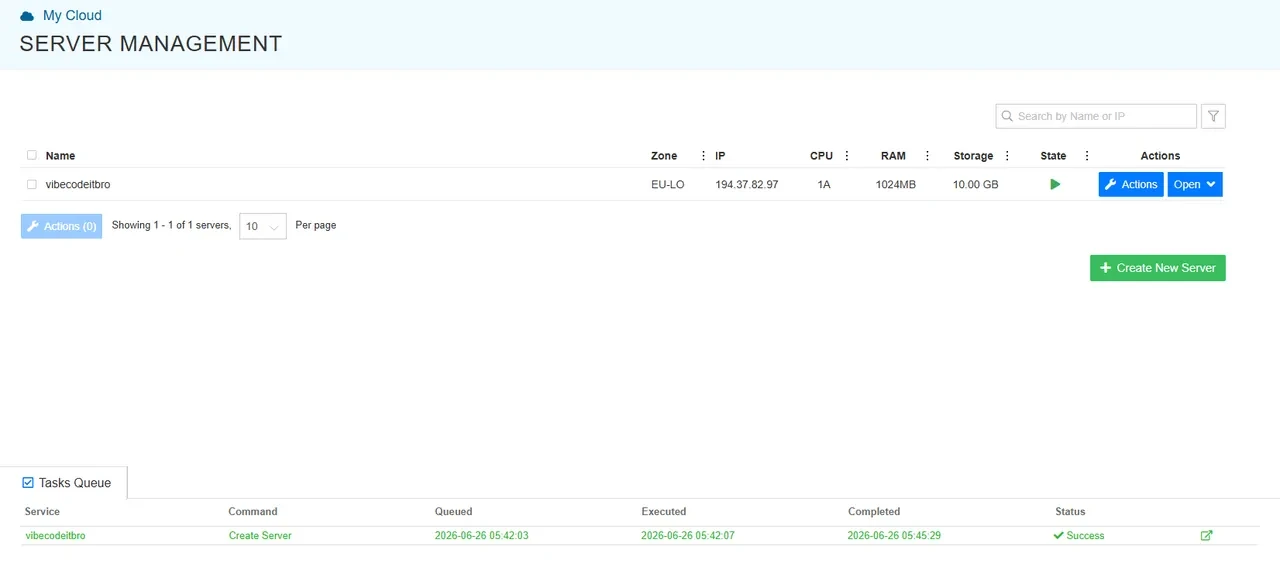
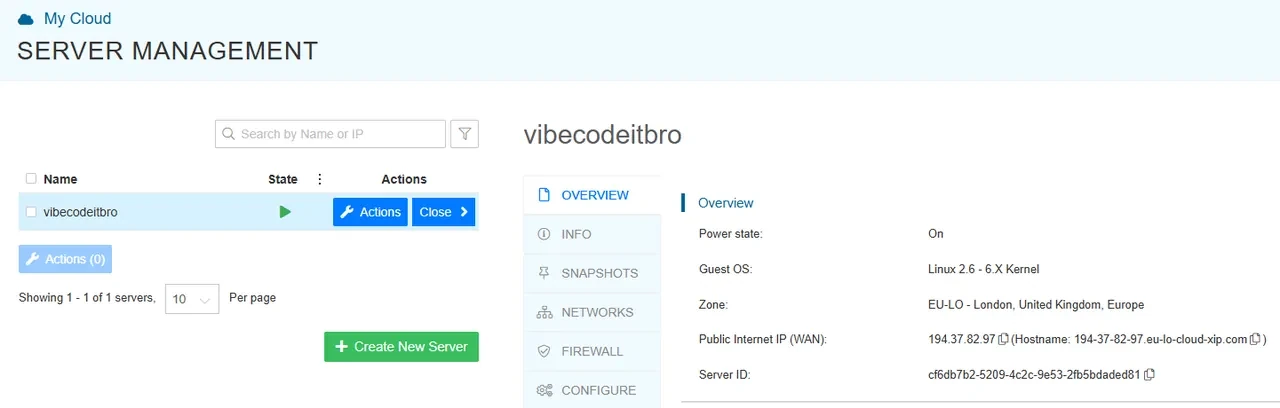
1.10Server created, shown in the server management list
Server created — appears in the server management list
1.11Server running - note the IP address
Server running - note the IP

Or use Contabo:

1.12Go to Contabo
Go to Contabo
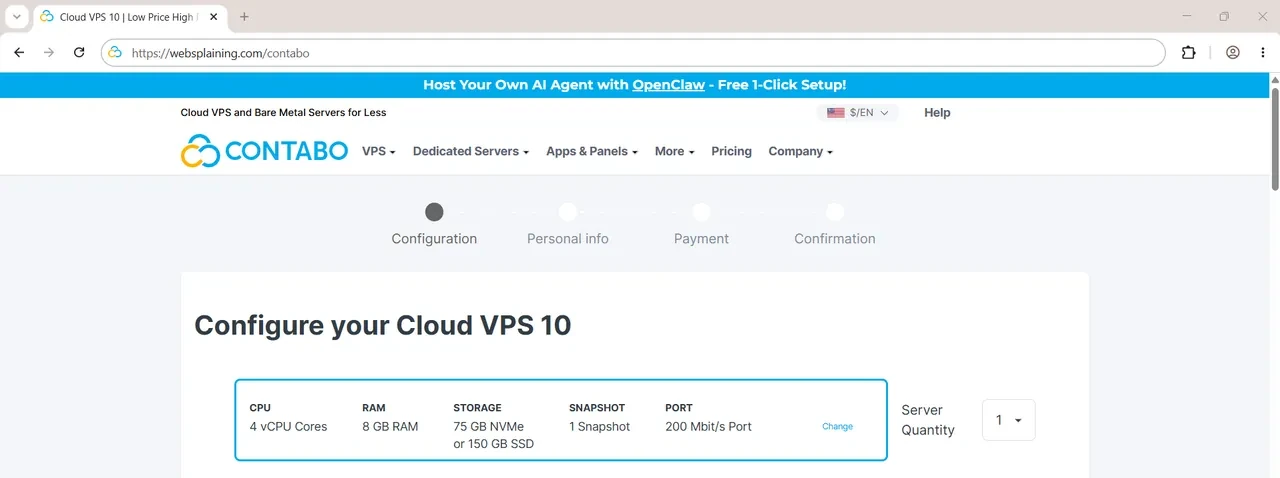
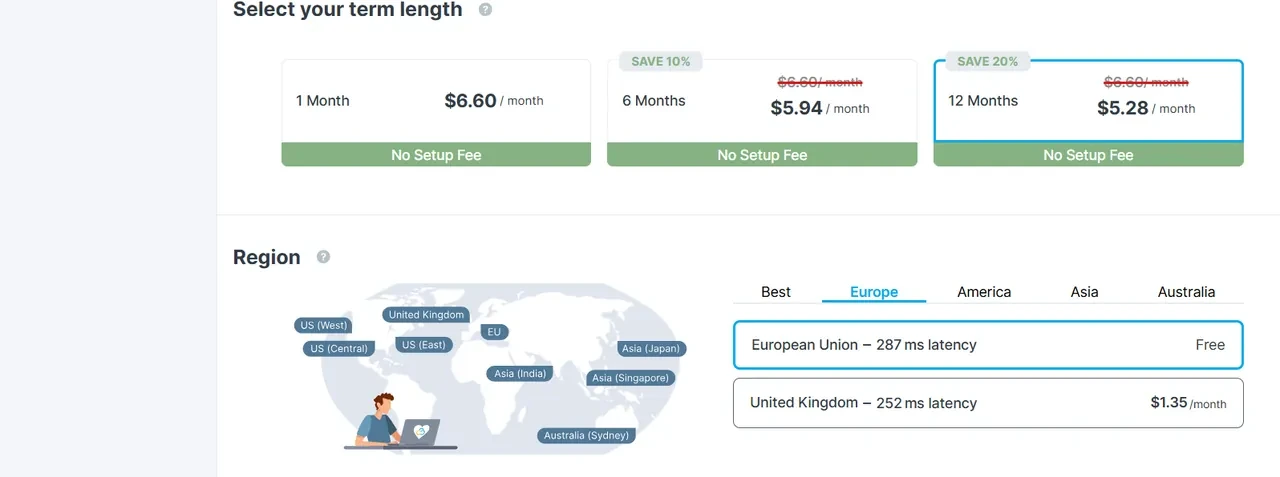
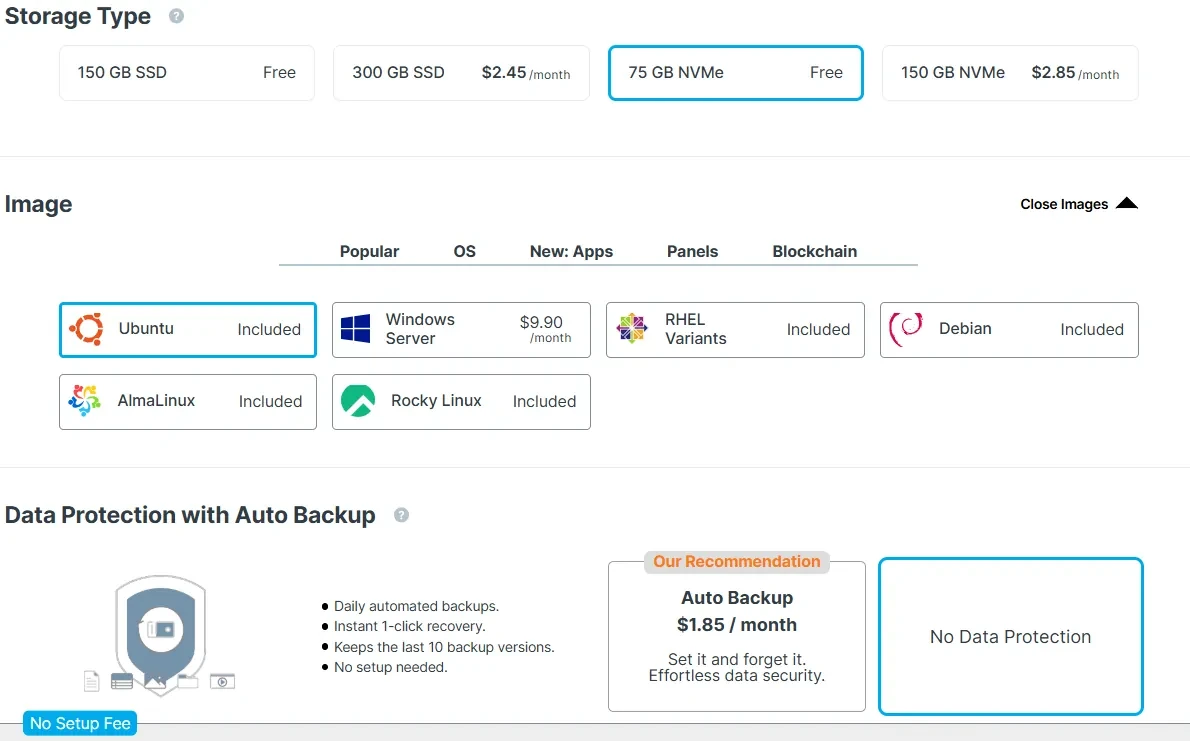
1.13Choose a VPS plan
Choose VPS plan
1.14Select Cloud VPS 4 (formerly VPS 10, now Core VPS 4)
Select Cloud VPS 4 (formerly VPS 10, now Core VPS 4)
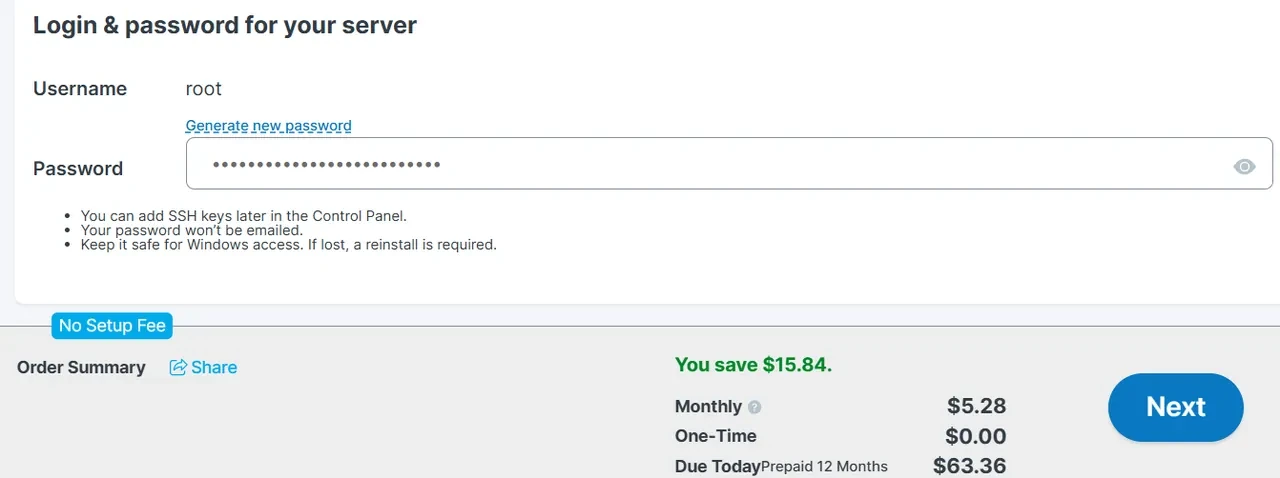
1.15Configure server login credentials
Configure server login credentials
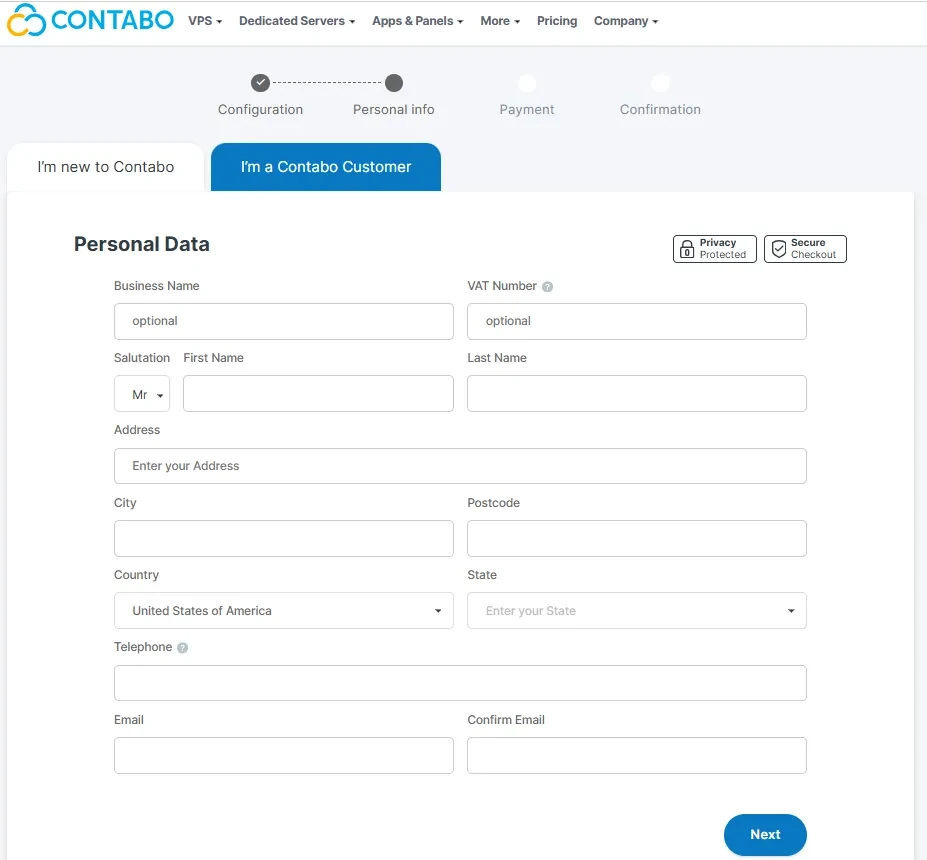
1.16Enter personal details
Enter personal details
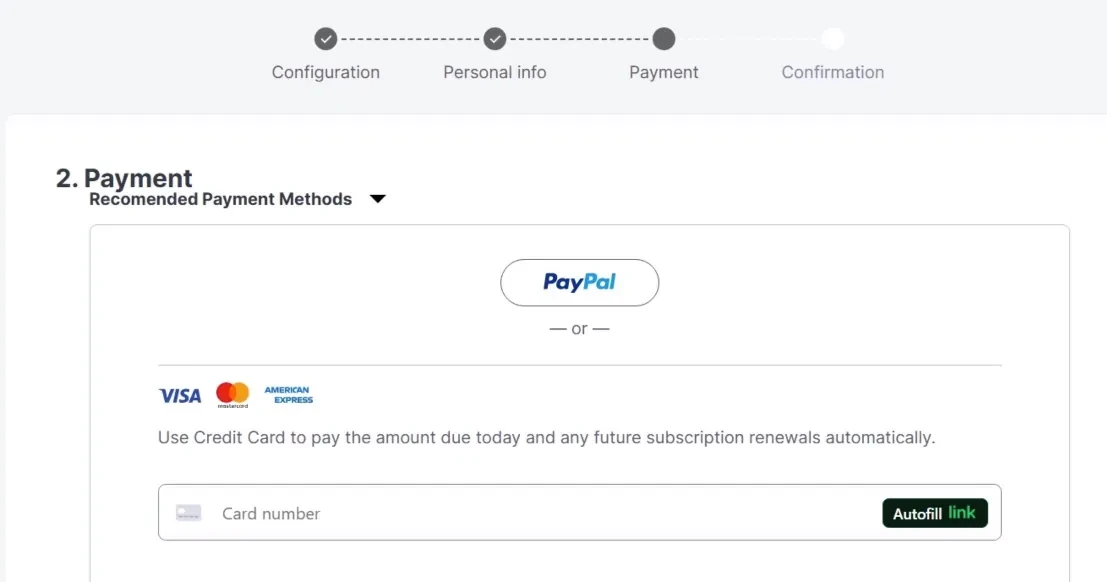
1.17Enter billing and payment details
Enter billing and payment details
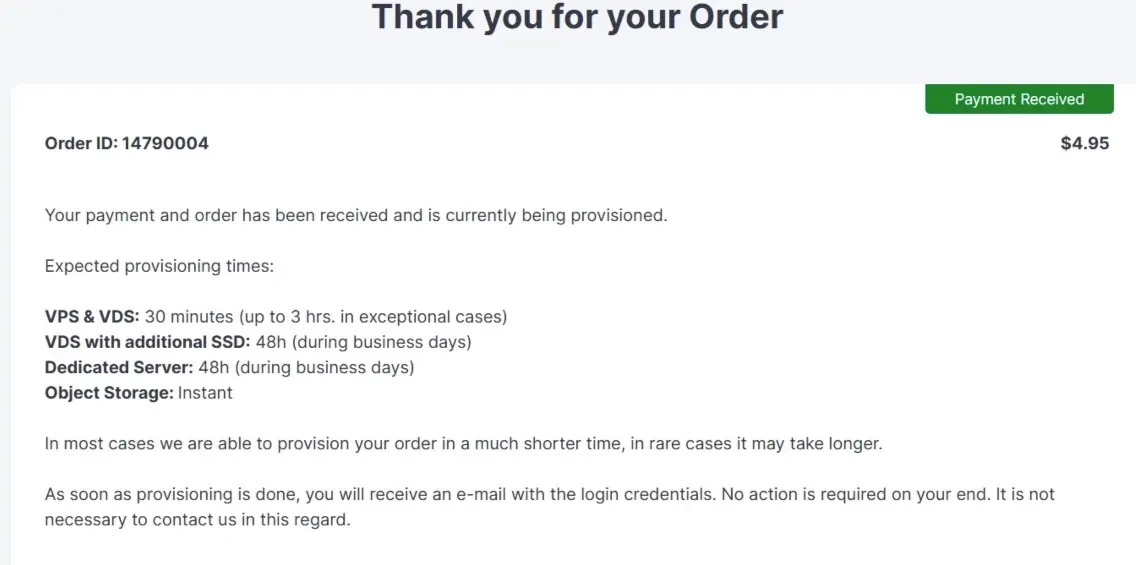
1.18Order complete and confirmation
Order complete and confirmation
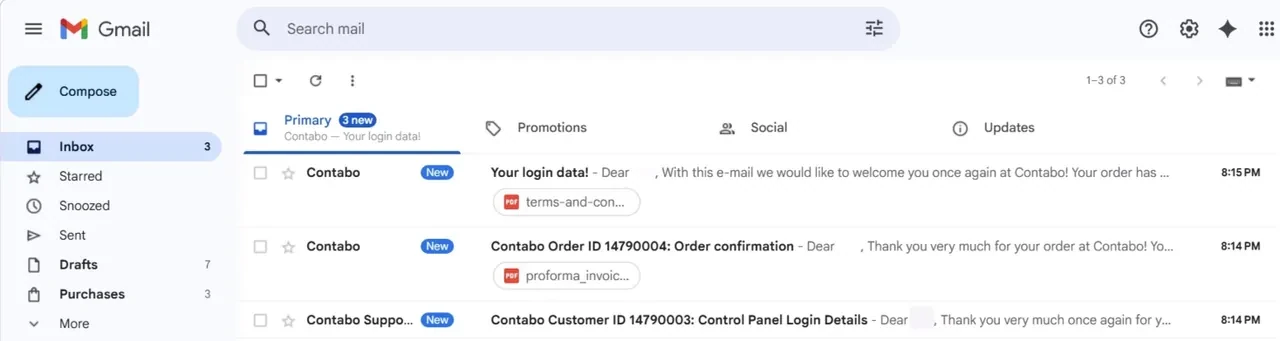
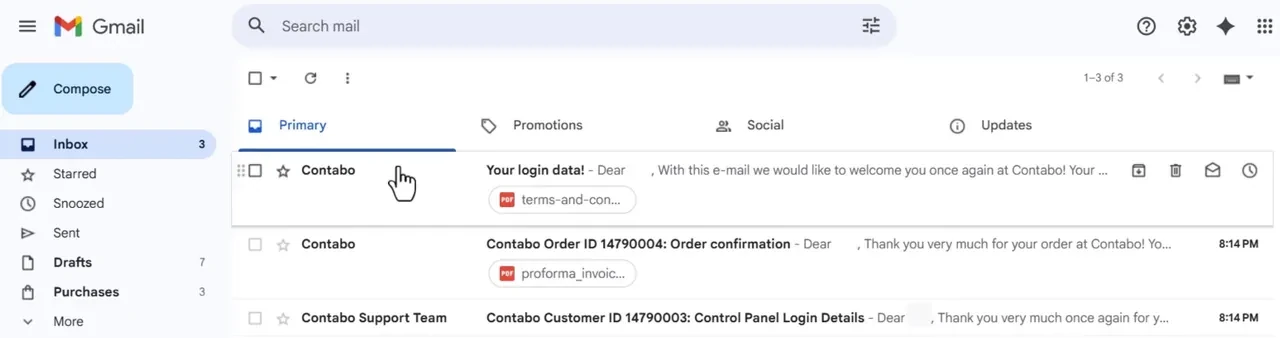
1.19Three confirmation emails arrive - check your inbox
Three confirmation emails arrive — check your inbox for the server IP address
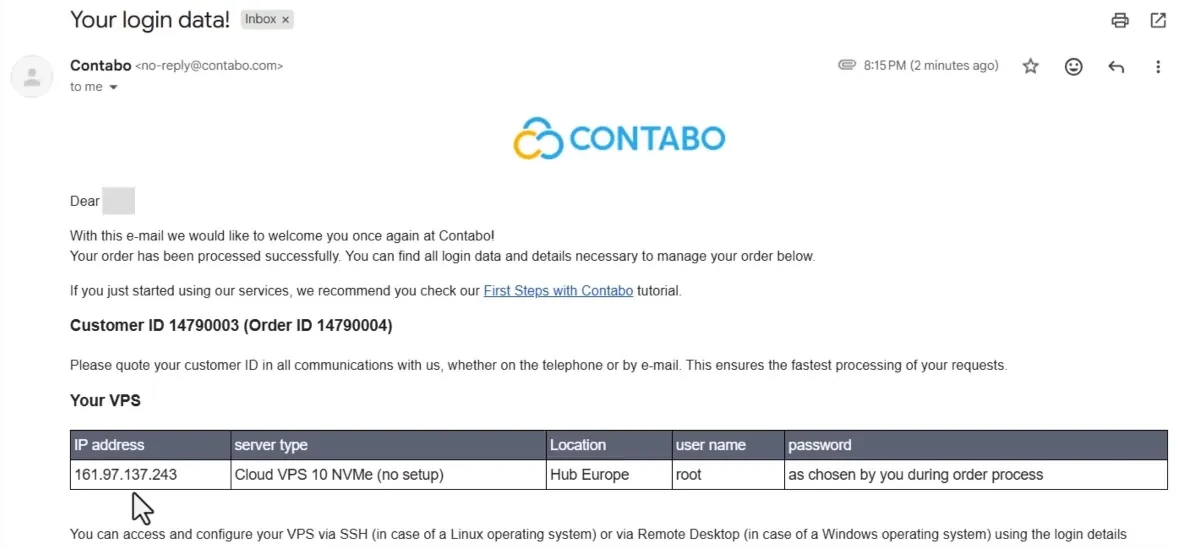
1.20Email containing your server IP address
Open the email containing your server IP address
1.21Login credentials: IPv4, username (root), IPv6
Login credentials: IPv4 address, username (root), IPv6 address
2

SSH in

ssh root@your-vps-ip. Type yes at the prompt.

2.1Open your terminal and type the SSH command
Open your terminal and type the SSH command
2.2Type yes to accept the host key
Type yes to accept the host key
2.3Enter the root password for your server
Enter the root password for your server
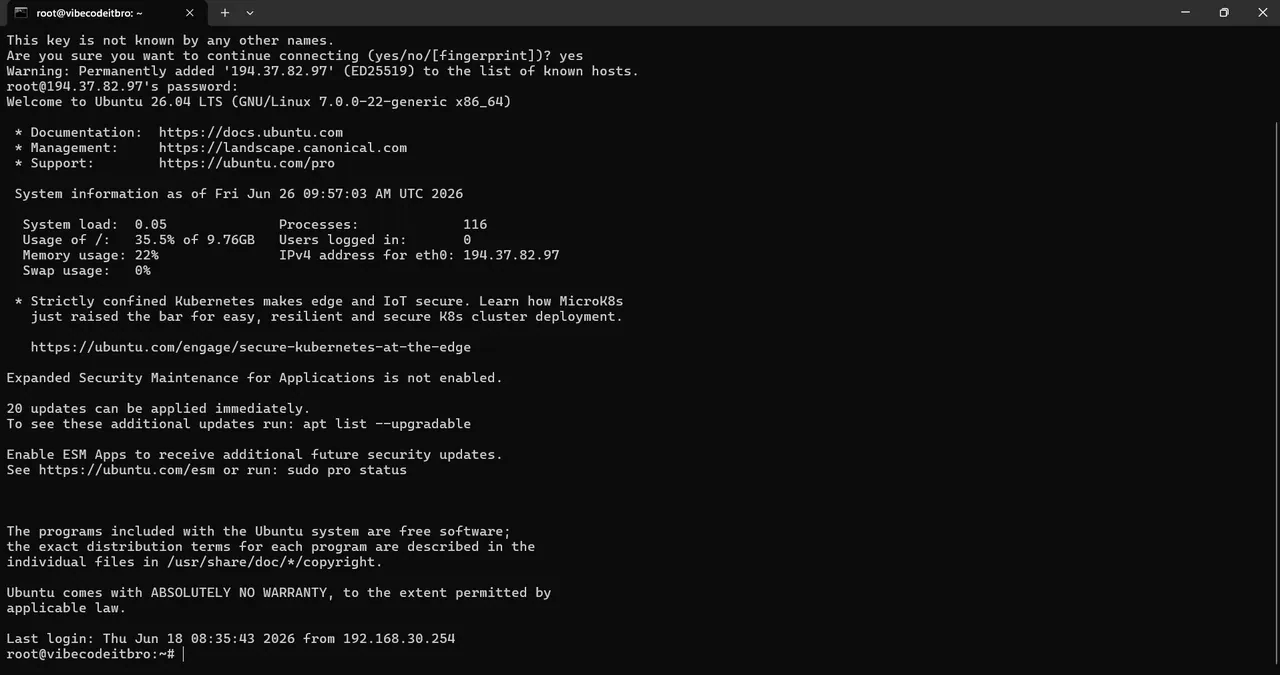
2.4Successfully SSH'd into your server
Successfully SSH'd into your server
3

Install OpenCode

Paste this into your SSH session and hit Enter:

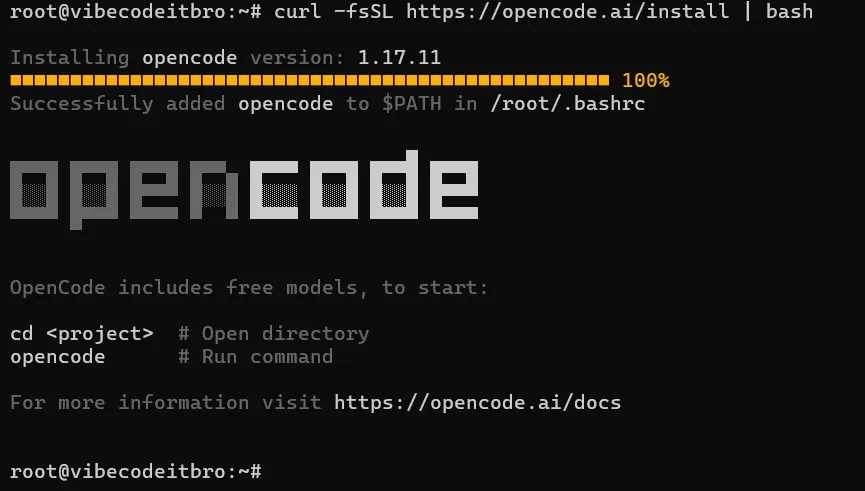
curl -fsSL https://opencode.ai/install | bash
source ~/.bashrc
opencode
3.1Running the curl command to install OpenCode
Running the curl command to install OpenCode
3.2OpenCode installed - run source ~/.bashrc
OpenCode installed — now run source ~/.bashrc
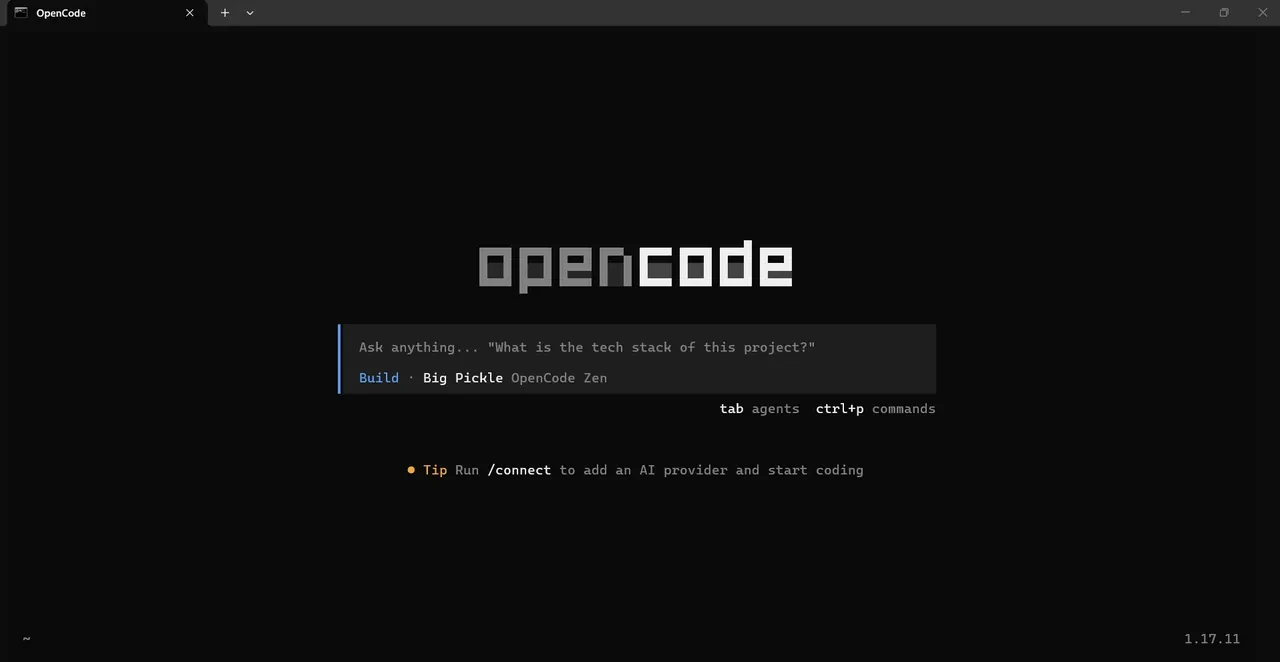
3.3After running the opencode command
After running the opencode command
4

Add OpenCode Go

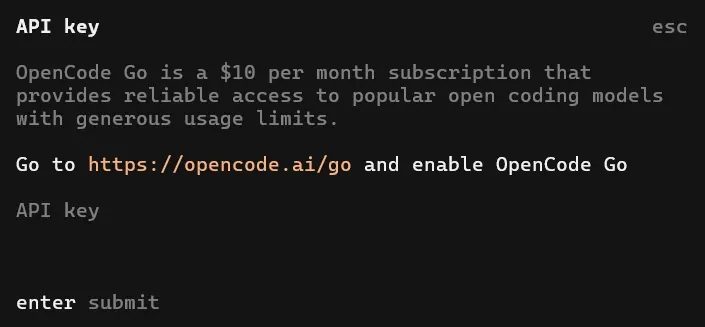
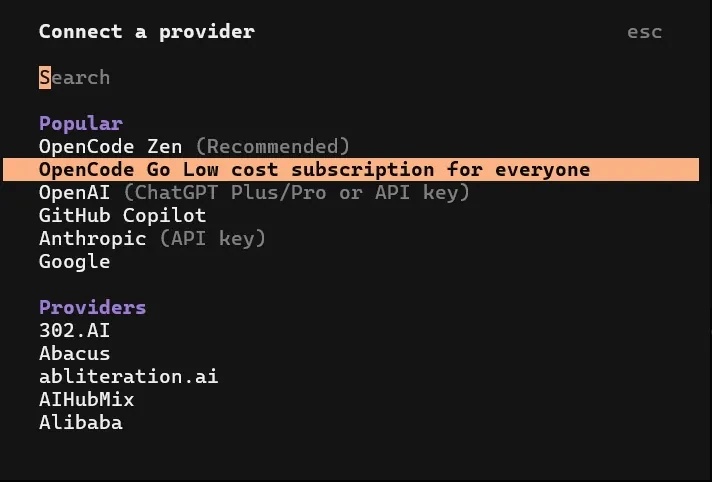
Sign up at opencode.ai and create an API key — then in OpenCode press Ctrl+P, choose OpenCode Go, and paste your key.
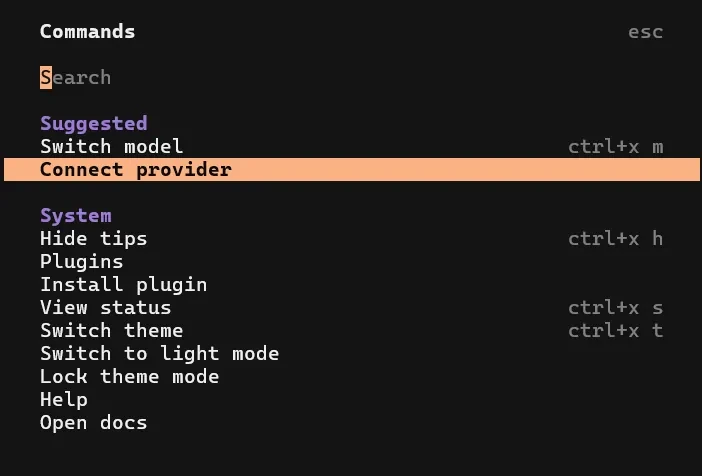
4.1Connect a provider
Connect a provider
4.2Choose OpenCode Go
Choose OpenCode Go
4.3Sign up to OpenCode Go using the affiliate link
Sign up to OpenCode Go using my affiliate link
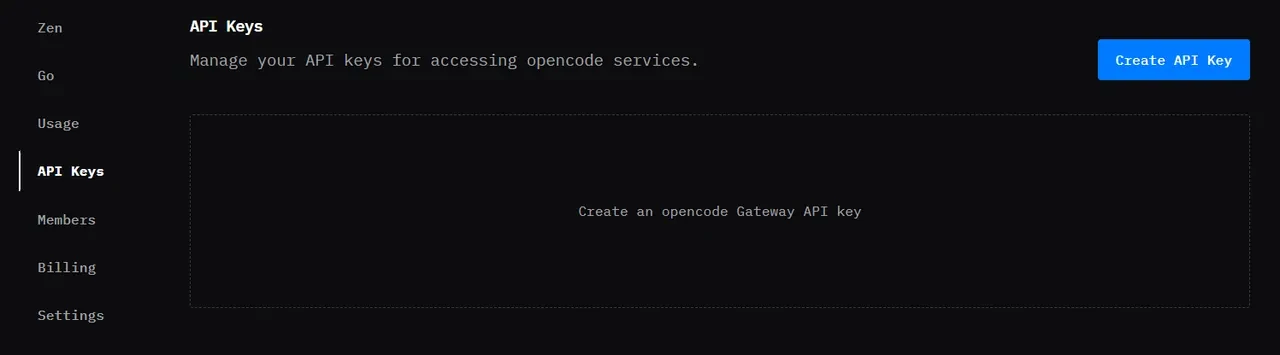
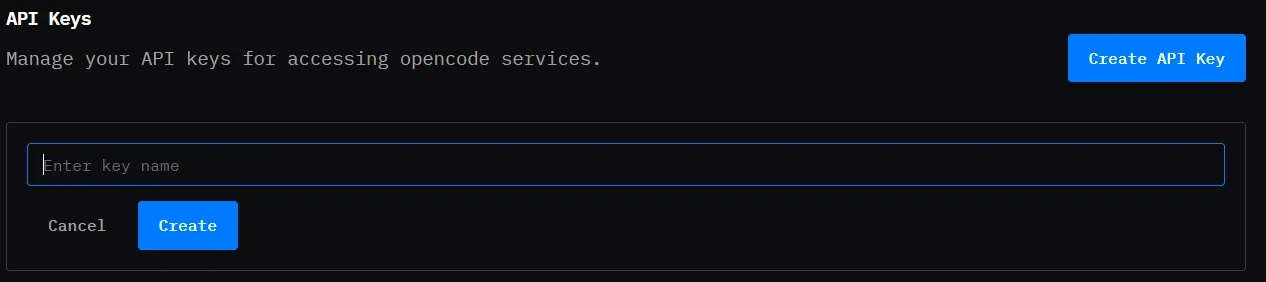
4.4Click API keys, then Create API key
Click API keys, then Create API key
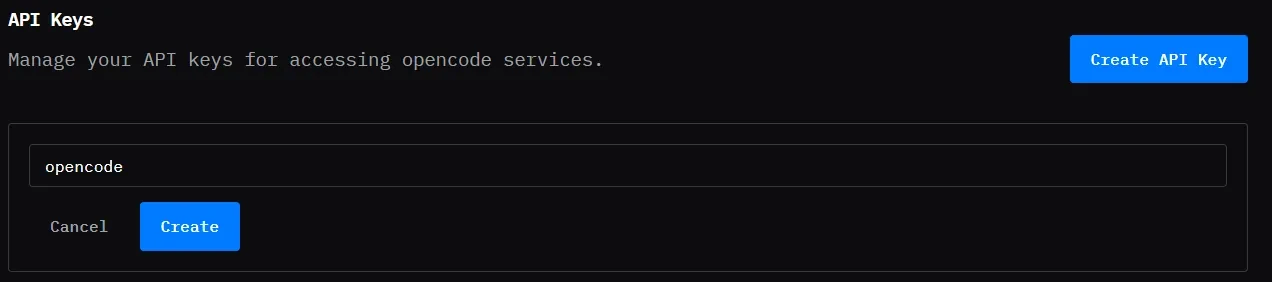
4.5Name or label your API key (e.g. opencode)
Give your API key a name or label (e.g. opencode)
4.6Click create
Click create
4.7Copy the API key with the copy-to-clipboard icon
Copy the API key — click the copy-to-clipboard icon next to it
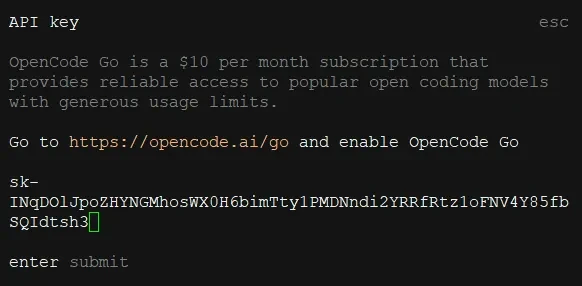
4.8Paste the API key (starts with SK-), then press Enter
Hold Shift and right-click to paste the API key (it starts with SK-, e.g. sk-WL68...szAkl), then press Enter

💡 No account? Grab one here.

5

Pick a model. Start vibing.

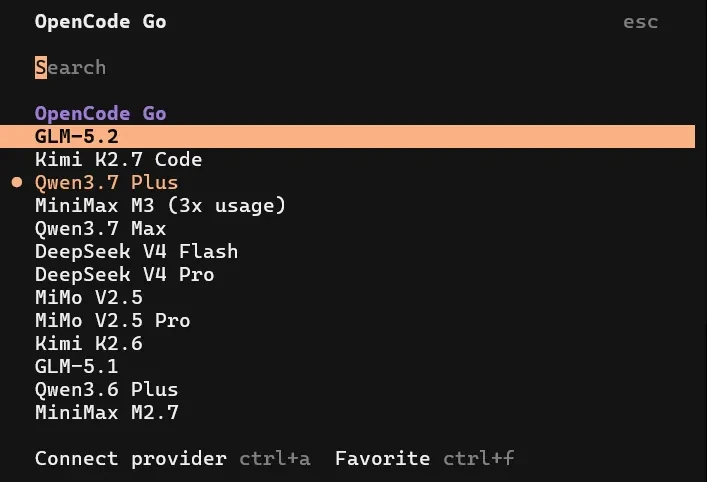
Hit Ctrl+P again, pick model:

5.1Press Ctrl+P for the live model list and choose a model
Press Ctrl+P for the live model list and choose a model
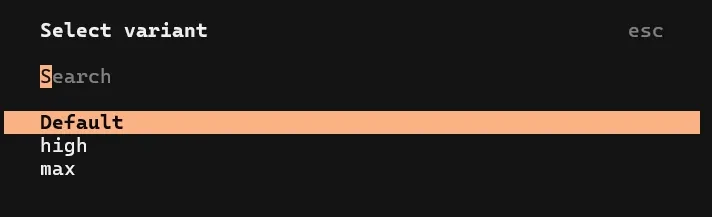
5.2Select a model variant - determines token usage and inference speed
Select a model variant — it determines how many tokens are burned and how fast inference runs (not all models have variants)
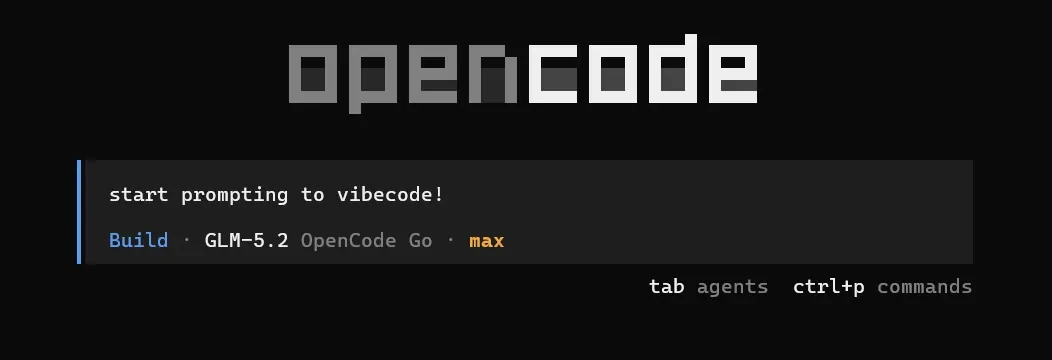
5.3You are now vibecoding
You are now vibecoding
loading model list...
// plan vs build

Two modes. Use the right one.

📐 Plan

Read. Think. Propose.

The agent reads your codebase and writes a step-by-step plan. No files are edited. Review the plan, nudge it in chat, switch to Build when ready.

🔨 Build

Read. Edit. Run.

The agent actually edits your files and runs commands. Pair with git commit for an instant undo button.

🧠

Pro tip

Always start in Plan mode. Read the plan. Clean it up. Then switch to Build. That's vibecoding vs vibepanicking.

Stop reading. Start vibecoding.